Html forms
topic 01
Forms for what?
- Collect input from your website’s visitors
- For mailing lists, contact forms or blog post comments
- Forms are the “money pages”
- E-commerce sites sell their products
- SaaS (Software as a Service) companies collect payment for their service
- Non-profit groups raise money online
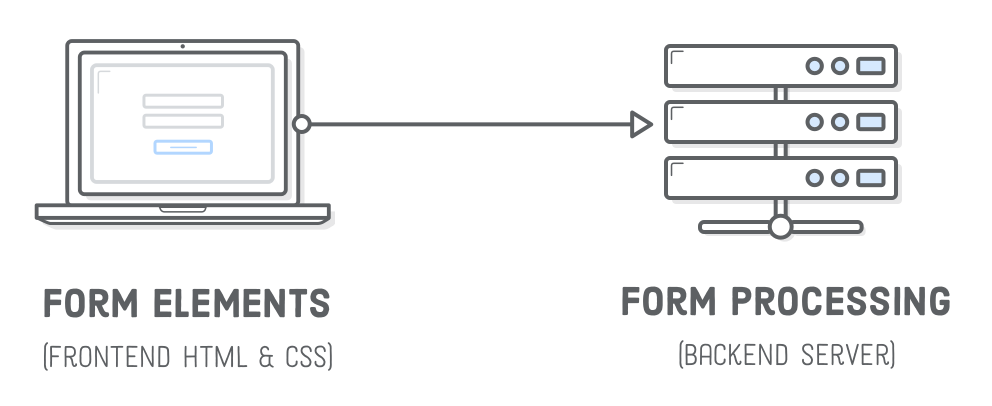
A functional HTML form needs…
…the frontend user interface and the backend server.
The former is the appearance of the form (as defined by HTML and CSS), while the latter is the code that processes it (storing data in a database, sending an email, etc).
On to forms!
Every HTML form begins with the aptly named <form> element.
<form action="" method="get" class="speaker-form">
</form>
Note: <form> accepts a number of attributes, but the most important ones are “action” and “method”

The action attribute defines the URL that processes the form.
It’s where the input collected by the form is sent when the user clicks the Submit button.
This is typically a special URL defined by your web server that knows how to process the data.
Common backend technologies for processing forms include Node.js, PHP, and Ruby on Rails.
The method attribute can be either
post
or get ,
both of which define how the form is submitted to the backend server. This is largely dependent on how your web server wants to handle the form, but the general rule of thumb is to use post when you’re changing data on the server, reserving get for when you’re only getting data.
Text input fields
topic 02
To actually collect user input, we need an <input /> element.
<div class="form-row">
  <label for="full-name">Name</label>
  <input id="full-name" name="full-name" type="text" />
</div>
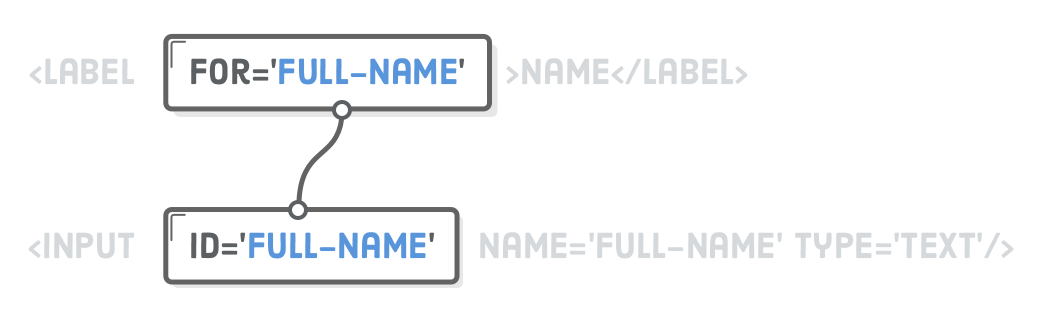
label is another semantic HTML element, like article or figcaption, but for form labels.
input element creates a text field.
Note: A label’s “for” attribute must match the “id” attribute of its associated <input /> element.
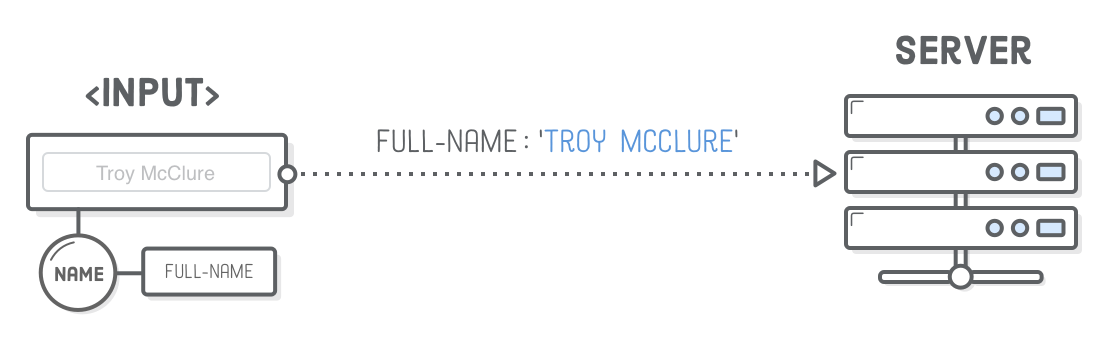
“Variable”
- Conceptually, an <input /> element represents a “variable” that gets sent to the backend server
- The name attribute defines the name of this variable
- The value is whatever the user entered into the text field
Note: You can pre-populate the value by adding a value attribute to an <input /> element
Styling text input fields
An <input /> element can be styled like any other HTML element.
input[type="text"] is called an “attribute selector” and
it only matches <input /> elements that have a type attribute equal to text.
Email input fields
The <input /> element’s type attribute also lets you do basic input validation.
For example, let’s try adding another input element that only accepts email addresses instead of arbitrary text values.
<div class="form-row">
  <label for="email">Email</label>
  <input id="email"
         name="email"
         type="email"
         placeholder="joe@example.com" />
</div>
Note: There’s a bunch of other built-in validation options besides email addresses, which you can read about on MDN’s <input /> reference
Styling valid/invalid states
- The :invalid and :valid pseudo-classes let us style these states independently
- There’s a similar pseudo-class called :focus that selects the element the user is currently filling out – this gives you a lot of control over the appearance of your forms
.form-row input[type="text"]:invalid,
.form-row input[type="email"]:invalid {
  border: 1px solid #D55C5F;
  color: #D55C5F;
  box-shadow: none;
}
Radio buttons
topic 03
Changing the type property of the <input /> element to radio
transforms it into a radio button.

Every radio button group should:
- Be wrapped in a <fieldset>, which is labeled with a <legend>
- Associate a <label> element with each radio button
- Use the same name attribute for each radio button in the group
- Use different value attributes for each radio button
<fieldset class="legacy-form-row">
  <legend>Type of Talk</legend>
  <input id="talk-type-1"
         name="talk-type"
         type="radio"
         value="main-stage" />
  <label for="talk-type-1" class="radio-label">Main Stage</label>
  <input id="talk-type-2"
         name="talk-type"
         type="radio"
         value="workshop"
         checked />
  <label for="talk-type-2" class="radio-label">Workshop</label>
</fieldset>
Note: It’s also very important that each radio button has the same name attribute, otherwise the form wouldn’t know they were part of the same group.
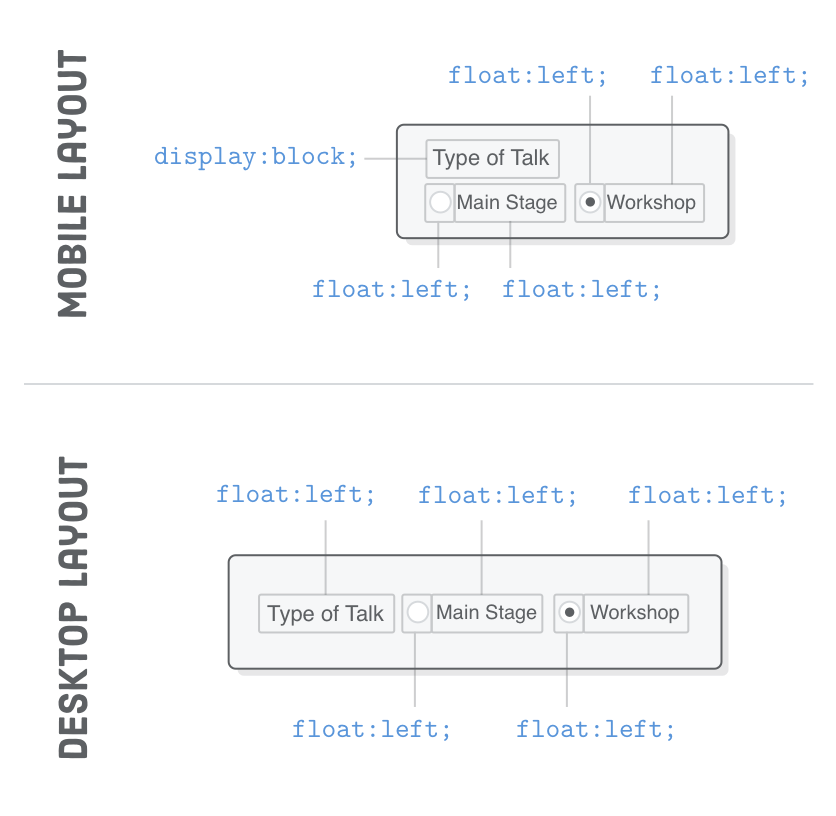
Styling radio buttons
For example:
Select elements (dropdown menus)
topic 04
Alternative to radio buttons
Dropdown menus let the user select one out of many options.
The <select> element represents the dropdown menu,
and it contains a bunch of <option> elements that represent each item.
<div class="form-row">
  <label for="t-shirt">T-Shirt Size</label>
  <select id="t-shirt" name="t-shirt">
    <option value="xs">Extra Small</option>
    <option value="s">Small</option>
    <option value="m">Medium</option>
    <option value="l">Large</option>
  </select>
</div>
Styling select elements
Dropdowns are a complex piece of interactivity, and their behavior changes significantly across devices.
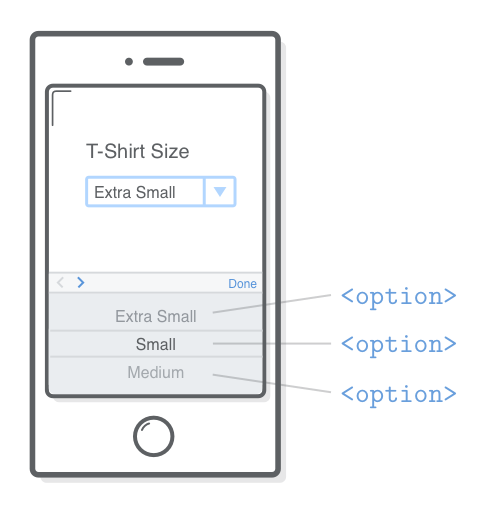
For instance, on an iPhone, clicking a <select> element brings up a native scrolling UI component that makes it much easier to navigate the menu.
Textareas
topic 05
Basic
The <textarea> element creates a multi-line text field designed to collect
large amounts of text from the user.
They’re suitable for things like biographies, essays, and comments.
<div class="form-row">
  <label for="abstract">Abstract</label>
  <textarea id="abstract" name="abstract"></textarea>
  <div class="instructions">Describe your talk in 500 words or less</div>
</div>
Note: This isn’t self-closing like the <input /> element, so you always need a closing </textarea> tag. If you want to add any default text, it needs to go inside the tags opposed to a value attribute.
Checkboxes
topic 06
Basic
Checkboxes are sort of like radio buttons, but instead of selecting only one option, they let the user pick as many as they want.
<div class="form-row">
  <label class="checkbox-label" for="available">
  <input id="available"
         name="available"
         type="checkbox"
         value="is-available" />
  <span>I’m actually available the date of the talk</span>
  </label>
</div>
Submit buttons
topic 07
Basic
The <button> element represents a button that will submit its containing
<form>:
<div class="form-row">
  <button>Submit</button>
</div>
Summary
topic 08
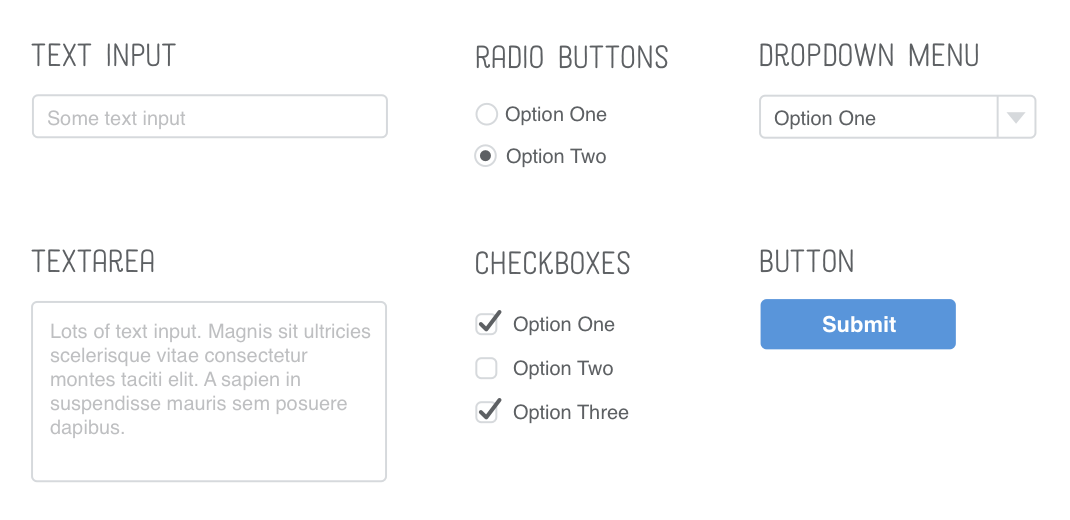
The most common HTML form elements and tools for collecting input from our website visitors:
<input type="text" /><input type="email" /><input type="radio" /><select>and<option>
<textarea><input type="checkbox" /><button>